Saturday, July 28, 2012

Yes Please!

I think I need one of these. Badly. Bespaq, I love you.
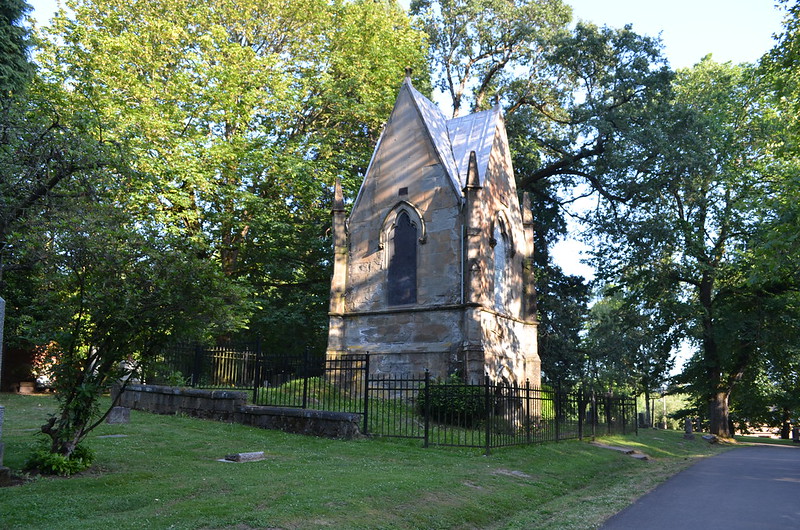
Which means I will have to build one of these to house it. Done and done! Goodbye boring graveyard, hello mansion of the rich and dead!

Day Two of Stonework

So, another couple of days of drying and the truth will be known but so far Das is a winner. And the price makes me giddy. I have been paying about $5.99 (less coupons) for a 7oz package of Creative Paperclay and a 35oz. package of Das is $6.99. Um, goodbye clapboard siding forever?

 The top section was done with the Creative Paperclay and the more narrow angled side on the right was done with Das. For this particular style of stonework, I think the Das "behaved" the best. The lines are more clearly defined and realistic up close where as the Creative Paperclay will need some post dry sanding and dremel routing to clean up some of the work. You can clearly see the difference in the photo. Also, I had voiced concern over the difference in color saying that the Das was much darker but it has really lightened up as it dries. I have yet to see any "joining" issues but it still has a day or two to dry completely. It hasn't been particularly warm here in Portland so it is taking a bit longer than usual. Any cracks in the work can be corrected with a little white glue and fresh creative paperclay smoothed in to fill. That is one negative with the Das. It isn't as smoothe as the PC.
I am really going to have to work these two sections so they look uniform because the Das side is so much more defined than the creative paperclay side. Ugh.

 Here is Anderson, my assistant. He just can't stand not being on or around the table when I am working. Right here he is guarding my super duper high tech clay roller contraption.

Here is a picture, sans cat, of my super duper high tech clay rolling contraption. I simply glued two strip of 1/8 inch trim on each side of a smooth board. Put the clay in the middle and rest the ends of your roller (I use a high tech rolling pin) so the ends rest on the trim, and roll. This ensures an even thickness. Someday I may buy a pasta machine but this has always served me well and it cost like .50 cents to make. PLUS you can make these in different sizes to reduce how much trimming you have to do.

Friday, July 27, 2012

First Pictures


Since things are rapidly coming together in this project, I have added some pictures of what it looks like now. Oh, it's like giving birth to a new baby. But not as painful. Well maybe sometimes as painful. But I'm a guy so I couldn't really say. I'll shut up now.
 Here is the stonework on the chimney. Still needs some layering and moss effects will be added at the end.
 These dormers are a bear to put together. Here is one that is just dry fit in place with a first color "wash". Not decrepit enough yet. I will be creating a stained glass window for this tower window. It just cries for one. I will also be creating stained glass for the grand second floor french window. Just haven't figured out the design yet.
 The surfaces have been sealed and the first coats of paint are on the areas that will not have stonework. I am getting excited! Almost to the fun parts!

My workshop. My messy work table. Wow, seeing it in a picture makes me realize that I really need to clean up!

             
The interior layout has not been changed. It works as it is.  

Here you can see some strip work which has been added to break up the heavy stonework that will cover the entire house. I used relatively deep strips because the paperclay will use about half the thickness. Acts not only as structural "reinforcement" but also breaks it up visually.

Well, there she is so far! Like I said, things are really starting to speed up and I am so excited. I will be obsessively photographing this project from this point forward so check back often!

Woops!!

So, I laid out the foundation base and began working on the hillside and boggy pond areas. No detail work, just the foam shape. I sat there staring at the work so far, using my imagination to mentally lay out the angle of the slopes, the flat areas, etc. Then it came to me. Will this fit through the door?

Nope.

My workshop is upstairs in a 100 year old house. It is a great work area where I can have the windows open for fresh air and look down at the cats as they sun themselves in the yard. HOWEVER, the doorways upstairs are very narrow. This presents a problem as I will now have to figure out a way to have the house removable from the base so it can be turned on it's side to get through the door. I wanted to avoid this as the house really needs to look "settled" into it's land and any time you uproot it from its base there is a chance of damage to the structure and/or the fragile detail work in the landscaping..

I do not want to have to scale back the base and lose "land" area. This is so frustrating. I will figure it out. If anyone has any suggestions, please feel free to share!

I will just get cracking on the exterior stonework and figure out the base later.

Thursday, July 26, 2012

The Landscaping

 What makes the difference between a run down property with occupants lacking funds and/or pride of ownership with a "haunted house"? The landscaping. This project is screaming for a very detailed landscaping plan and that is what makes this the most involved project I have ever begun. The photo above shows a sample of what will serve as a base for this house. The house, especially with a name like Beacon Hill (which is not going to be it's final name) will be perched on a small hilltop with a series of steps leading up to the front door. This will give me ample opportunity to incorporate detailed stonework which I love.

I will also be adding a swampy, boggy pond area which will feature a clues as to the tragedies which have befallen this house and it's occupants. I love, love, love working with water effects because, when done well, they really bring a scene to life (or death in this case). I will be adding lots of reeds and other foliage around the edge of the pond and many hidden details will be tucked here and there.
If I have room to add a dilapidated gazebo, that may also be placed on the property. Also, it will be late fall in the scene. No snow yet, but lots of rain so I will be adding water effects to the actual structure. Rain puddles, wet roofing, etc. There is so much you can do with water effects. I use a product called Magic Water which, in my humble opinion, is the best product out there both for results and ease of use. It was marketed specifically for model railroaders but it can easily be used in any scale.

I will be using a strip wire and clay technique to create dead trees and a small family cemetery will be featured. I will be extensively photographing these techniques as I go along. Maybe something I share will help you learn a new technique.

My excitement with this project is intense and I can't wait to start really digging into the detail work. I am almost done with the basic structure so it should not be too long before I can get to all the fun parts! Stay tuned! Please comment come back often!

Kit Bashing For This Project

I can never leave a kit alone. No matter how perfect the design. Just the thought of having the same house as someone else feels wrong. I always put my own stamp on it. The Beacon Hill is a brilliant design. I just had to change a few things, especially for the haunted theme I am going for in this project.

I completely changed the chimney, eliminating the decorative top for a more squared look with two "flutes" jutting up instead. I also used creative paperclay to achieve a dark stone look.

I will not be using any of the trim work or brackets included in the kit. I have chosen to hand cut my own and also incorporate some laser cut brackets as well.

I do not think I will be using the front door that came with the kit. Instead I will build my own, a more stylized and forbidding looking door.

I have eliminated the porch roofing altogether and have changed the second floor curved french doors into a large window. A small accent balcony will create visual interest.

I will not be using the clapboard siding or the shingles. I will use paperclay to create a fantastical styled slate roof and will be doing extensive stonework on the entire outside of the house.

I eliminated the angled roofing that sits atop the first floor bays and have opted to go with a more stark and hard angled line.

I am searching for scale gargoyles to sit atop key points on the roof line as well as the front bay window.

I left the interior layout alone because it works the way it is and the structural integrity may be affected by and wall changes. The "closet" in the upstairs bedroom will serve as a "secret" room hidden behind a bookcase and I will be making the tower roof a usable space by adding additional flooring, lighting, and a fold down staircase.

I may change or amend some of these modifications as I go along but the image I have in my head is pretty strong. I can't wait to put up some pictures to share and get comments and suggestions!


Wednesday, July 25, 2012

Welcome to my new blog! Here I will be detailing all my adventures (and misadventures!) of the largest dollhouse project I have ever undertaken.

 I have been doing miniatures for over twenty years, specializing in unique and spooky settings. I have finally decided to dig my heels down and create a truly spooky full haunted house complete with grounds and landscaping. The kit I am using as a base (for I am bashing the hell out of it) is the ultimate kit for a haunted house-  The Beacon Hill by Greenleaf. It has just the right elements for attracting spirits and ghoulies and all things that go bump in the night. This kit is a challenge but the final result will be worth the effort.

I tend to do cottages, room boxes, and individual pieces. This time I felt the need to have at least one major house to showcase in my home and a haunted house is right up my (dark) alley. I have always had a passion for scary films and really wanted to being many homages to my favorite fright films so there will be alot of those scattered throughout. There will be nothing "cute" about this house. This house has a past. A bad past. And those who dare venture through it's doors may find themselves paying the ultimate price for their curiosity. The spirits in this house DO NOT like visitors. For the astute visitor, this house will tell a story. The clues will be everywhere. It will be fun to see how many can figure it out.

I will be posting pictures of my progress from this point forward. Unfortunately, the main construction photos were taken with my phone and for some reason or another my computer will not let them transfer. But who cares about those pictures. There are many already out there on Beacon Hill construction. The fun bits will be the finishing touches.

I will be using alot of different techniques to bring unique touches to this house. Various stonework on the outside, slate shingles from paperclay, and alot of aging techniques, and maybe even some stained glass work. I will also be creating a cemetary and a boggy pond, mud puddles, and muddy footprints leading from the bog to the front door. I have been using water effects in my scenes for years and will share with you all the tricks I have learned to create truly realistic effects.

I will NOT be electrifying this house. Instead I will be incorporating the new battery operated lighting that is now available to us. This house will be using very little lighting so it would be a waste, as well as added frustration, to wire it. I HATE wiring. Just FYI.

So please, follow me on this journey. I will be updating as much as possible and will share everything with you so as not to bore you too much.

Thanks for stopping by and don't be a stranger. Leave comments! Contact me with questions! I love this art and love to share with others.